
So I made the mistake of asking my instagram audience what ice cream flavors they’d like to see me develop. And, well…I got some suggestions. The only reason I say it’s a “mistake” is because I really liked all of the suggestions and I’m probably going to make (and eat) all of them. Parts of my body will love it, others won’t.
But I must press on with this important work, so here is one of the most requested flavors. I opted for using fresh mint, mostly because I actually had a bunch on hand and I don’t have any extract on hand. But once I tasted this batch, I knew that an extract could not hold a candle to the perfectly smooth yet not-too-subtle mint flavor the fresh stuff imparted. So I’m not even going to present an option for extract here.
Quick notes:
- Make sure you have an ice cream maker.
- Also to make this recipe right, you need about half a day or so. So plan for that.
- If you don’t have a high-powered blender, you can use a regular blender, then, after the blending step, pass the mixture through a fine mesh strainer to remove any unprocessed cashew pieces. Then proceed with the mint steeping process.
- If I forget to soak my cashews, I place them in a microwave safe container and cover with water. Then nuke for 2 minutes and let rest another 5 minutes. Then they’re ready to go.
- Below you’ll find excerpts from my instagram stories showing some of the making of this recipe.
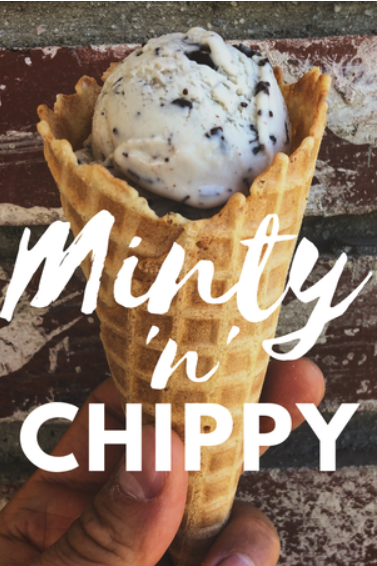
Mint Chocolate Chip Ice Cream
Makes about 3 cups
- 1/2 cup raw cashews, soaked at least 1 hour (overnight, if you don’t have a high-powered blender), drained, and rinsed
- 1/2 cup water
- 14 ounce can coconut milk (regular, not the “lite” stuff)
- 3/4 cup granulated sugar
- 1 teaspoon vanilla
- Pinch salt
- 1 bunch fresh mint (about 1 1/2 cups including the stems and everything)
- 1 teaspoon arrowroot powder/flour
- 1/3 cup dark chocolate chips
- 3/4 teaspoon refined coconut oil
Into a (preferably) high-powered blender, add cashews, water, coconut milk, sugar, vanilla, and salt. Blend until smooth, about 1 minute, scraping down the sides, if necessary, to mix in any stray cashew pieces that jumped up onto the side.
Transfer to a medium saucepan, and submerge the mint, stems and all, into the milk. Heat on medium, stirring occasionally, until it just begins to bubble. Let it simmer 2 minutes, then turn off the heat. Let mint steep in the milk for 1 hour.
Once an hour has passed, remove the mint from the milk, making sure to return as much milk to the pot as is possible either by gently shaking or pressing into a fine mesh strainer over the pot. Surprise, the milk will not be green. Commercially made versions add food coloring, which I suppose you can do at this point if you like. I won’t be mad at ya.
Remove 2 tablespoons of the milk and place in a small bowl. Add the arrowroot, and whisk it into the 2 tablespoons of milk until dissolved. Place arrowroot mixture back into the main pot, and heat over medium, stirring continually, until the arrowroot activates, and the mix thickens to an almost pudding-like consistency, 4 to 6 minutes.
Once thickened, immediately transfer to a wide, high-sided vessel, and stir it around for 3 to 4 minutes to promote quick cooling. Once cooled (it can still be a little warm), transfer to a container and cover tightly. Refrigerate at least 4 hours.
Add the chilled cashew/coconut mixture to your ice cream maker, and do whatever the maker’s instructions say you have to do to make it into ice cream.
To get those signature non-uniform, chocolate freckles and chips, you have to do some abstract art. Place chocolate chips and coconut oil into a small microwave safe bowl. Microwave 20 seconds. Almost nothing will happen, so stir it around and continue microwaving in 20 second bursts, stirring after every nuking, until it’s totally melted.
Chose a container that’s about 1 quart or so, and with the tines of a fork (or a child size spork), swoosh, swizzle, and splatter the inside surfaces of the container with chocolate. Next spoon enough ice cream on the bottom to make an even layer, then do more chocolate art on top of that layer. Add another ice cream layer, and then more chocolate squizzles. Continue until all the ice cream and chocolate is used up. Cover container, and place in the freezer for 1 hour.
After an hour, the ice cream will be plenty cold but not totally frozen and still soft. Using a spoon, stir the ice cream. This will break up all those swoozles of chocolate, achieving that signature flecked look.
Again, tightly cover and place in the freezer at least another 3 hours. It’s fairly easy to scoop right out of the freezer, but letting it rest at room temperature for 5 minutes will make it a lot easier. Enjoy!